Enterprise Architect Excel Exporter allows users to export Model information as Excel documents.
Excel Exporter can be used to publish elements, connectors, tagged values, test cases, scenarios and various other model information, into Excel spreadsheets, for easy review and updates by the wider team.
Steps to Export EA Model Information to Excel:
Step 1: Select the EA Model that contains the information to be exported.
Step 2: Create/Choose the Specification for the EA Model to be exported.
Step 3:Create/Choose the Output document to be exported.
Step 4:Select the Worksheet from the output document to be exported.
Step 5:Generate the model elements in Enterprise Architect to Export the document.
Export Excel Profile
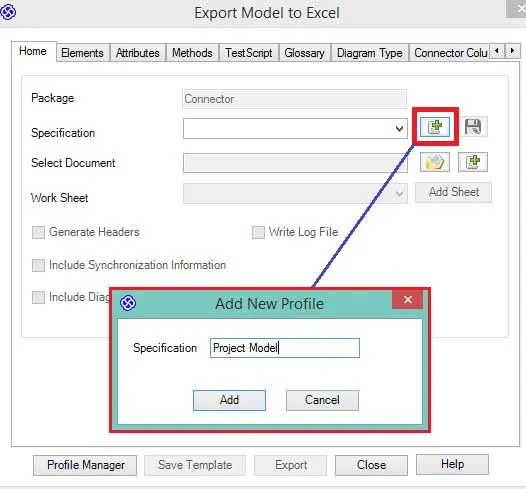
To Export data from EA Model, choose ‘Export to Excel’. The following dialog appears,
Select highlighted icon to create a new profile,
Home Tab
Mandatory Mappings:
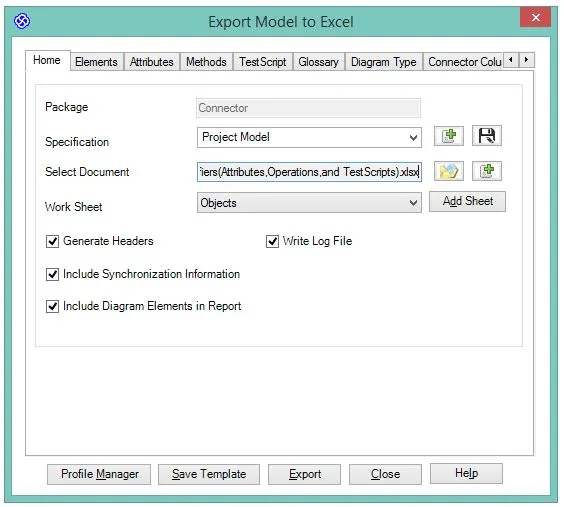
- Specify document to Export (Can use existing document or create new Excel document) using two nearby button icon.
- Select the concerned work sheet from the dropdown or create a “New Work Sheet”
Optional Mappings:
- Generate Headers: Select this option to Export properties along with column name.
- Include Synchronization Information: Select this to Export Unique (GUID) information for every Object and Classifiers (Attributes and Methods).
- Include Diagram Elements in Report: Select this and also select the appropriate diagram type’s in Diagram Tab, this will leads to include the element in the export from external Packages that are referenced in a diagram under each package.
- Write Log File: It maintain, every Object Export Status.
Note: User can also export the data through unsaved profiles
Elements Tab
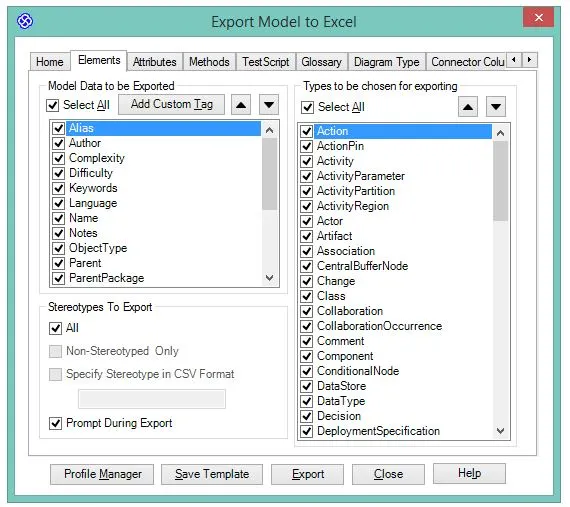
Model Data to be exported: All the properties are selected by default. User can,
- Select/Unselect the properties.
- Defined Tag Properties globally.
- Create Custom Tag using “Add Custom Tag” button.
Types to be chosen for Exporting: All the Object types will be selected by default. User can,
- Arrange the Order of export.
- Select/Unselect the Object Types.
Note: Should select minimum one object type and Object properties to Export.
Stereotype to Export: Specifying stereotype filters the exporting elements.
- All: Exports all the elements under the selected Object from Enterprise Architect.
- Non-Stereotype: Objects without stereotypes are exported.
- Specify Stereotype in CSV Format: User can define multiple stereotypes in CSV Format; the exporting objects must contain these stereotypes.
- Prompt during Export: While starting Export, its pop-up the dialog, that shows all the stereotypes under the selected node from Enterprise Architect.
Attributes Tab
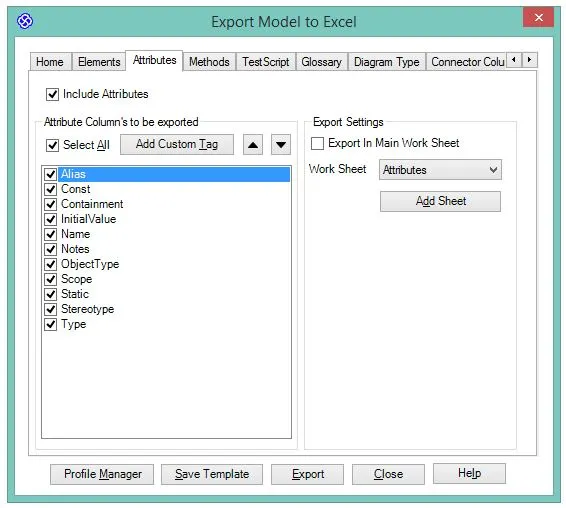
Selecting “Include Attributes” will enable “Export Settings” group.
Must select separate worksheet or choose to export in the Main Worksheet.
Select the attribute properties to export. Users can also define “Custom Tag” to include any additional tagged values defined in the model.
Methods Tab
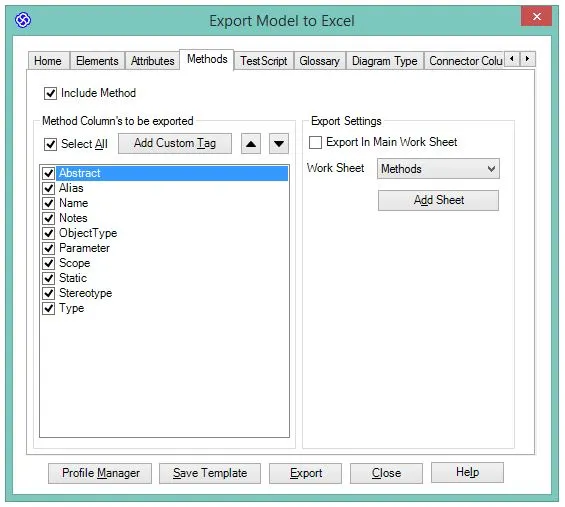
Selecting “Include Method” will enable “Export Settings” group.
Must select separate worksheet or in Main Worksheet and select minimum one Method property to export. It also loads Global Tag, we can define “Custom Tag” also.
Test Scripts Tab
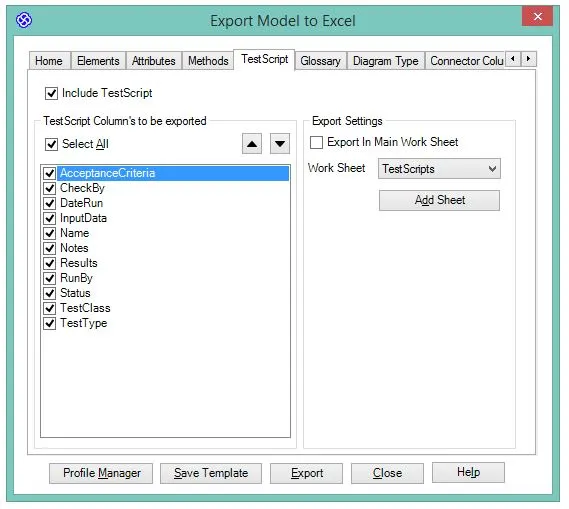
Selecting “Include TestScript” will enable “Export Settings” group.
Must select separate worksheet or in Main Worksheet and select minimum one TestScript property to export.
Glossary Tab
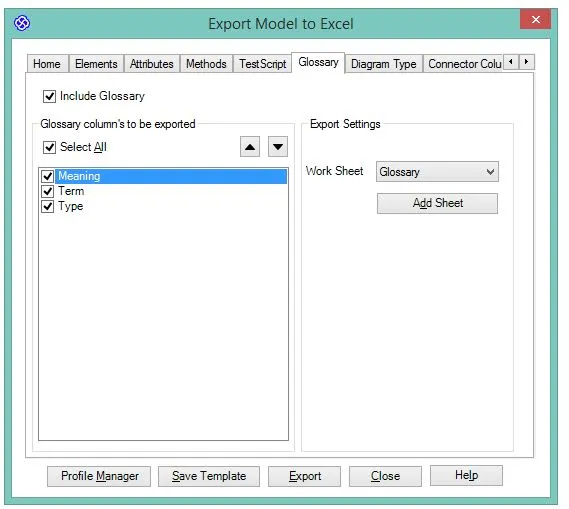
Selecting “Include Glossary” will enable “Export Settings” group.
Select Worksheet to export Glossary and also select minimum one property to export.
Diagram Type Tab
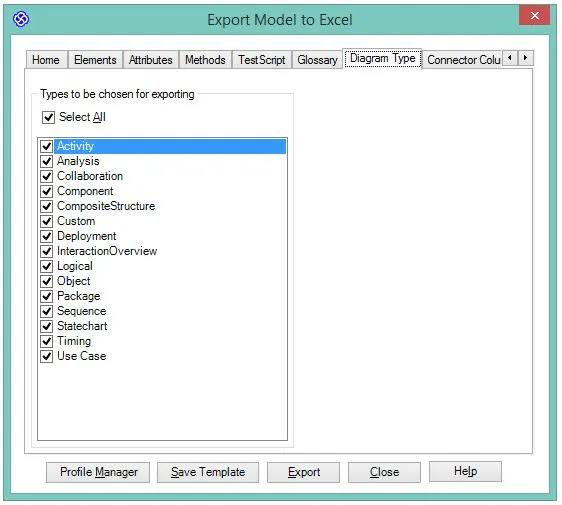
It is used to export all the objects available in diagram, irrespective of objects available under selected node. We must select “Include Diagram Elements in Report” in Home Tab and also select suitable diagram type to export the objects.
Connector Tab
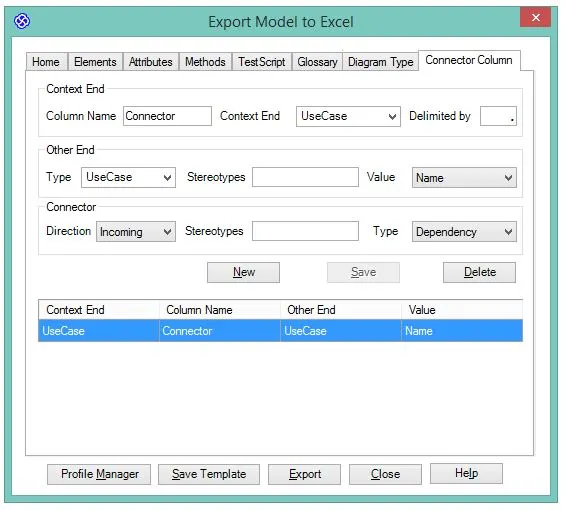
Context End: Used to define the settings of one end of connector.
- Column Name: The name is connector column name, which will be displayed in the generated Excel document.
- Context End: Select the element type for one end of the connector.
- Delimited By: Exporting the Object Name into the corresponding Connector Column in Excel should be separated by this delimited value.
Other End: Used to define the settings of another end of the connector,
- Type: Select the element type for another end of connector.
- Stereotype: It defines the stereotype for the other end of the connector.it support CSV Format.it filter out the connector to Export.
- Value: It used to search, that which type of the property should match the connectors that needs to be exported.
Connector: Used to define connector settings,
- Direction: Specify direction of the connector.
- Stereotype: It defines connector Stereotypes
- Type: It defines type of Connector
Note: Except Stereotype input, all other inputs are mandatory!!!
Export Process
While selecting Export button, two options will be displayed.
- To Local System: Allows user to export document to the local system.
- To SharePoint: Allows user to export document to the SharePoint folder. For more information regarding SharePoint export, refer “C:\ProgramData\MDG Integration for Microsoft Office\Help Document\UserGuide\index.html”
It gives a pop-up, like
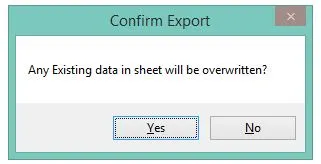
Prompt during Export option, will prompt here, it shows all the object stereotypes available under selected Node from Enterprise Architect
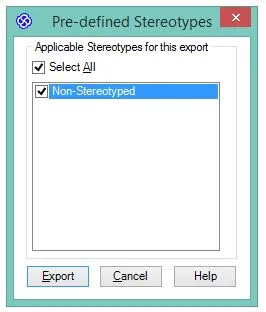
Select Export, to export non-stereotyped Object.
Exported Document
- Elements are exported with GUID information.
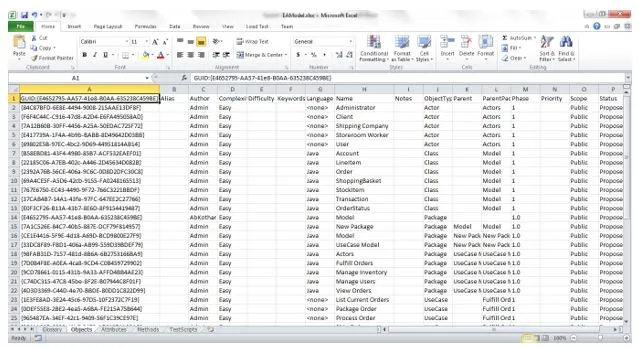
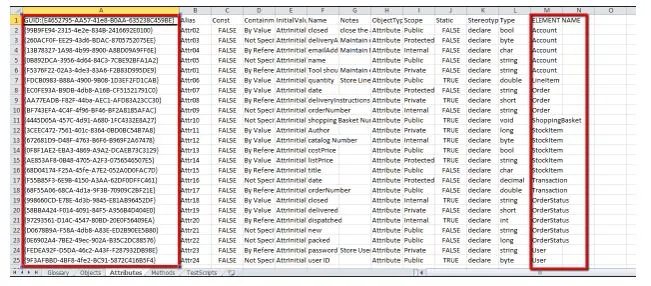
- Attributes are exported with GUID information and parent object information under “GUID” and “ELEMENT NAME” column, respectively, which is highlighted.
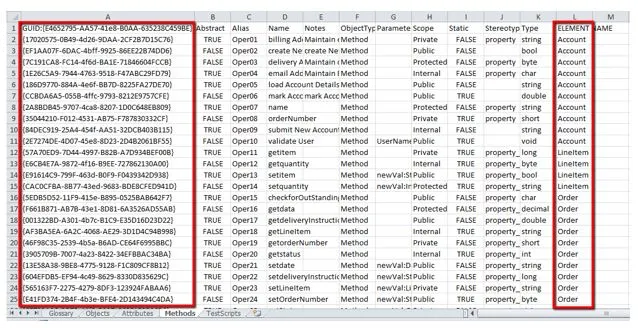
- Methods are exported with GUID information and parent object information under “GUID” and “ELEMENT NAME” column, respectively, which is highlighted.
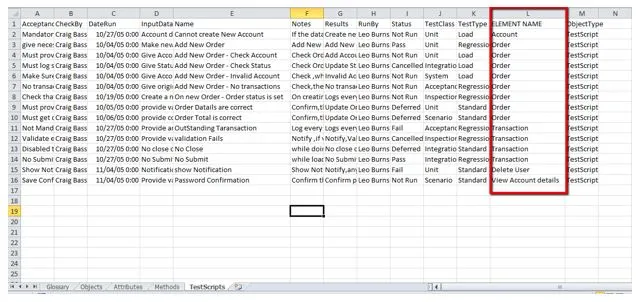
- TestScripts are exported with Parent object information in “ELEMENT NAME” column, which is highlighted.
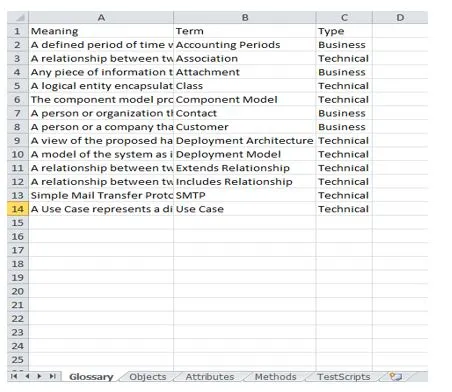
- Glossary Exported with Term, Type and Meaning column. It is Model defined.
- Connector Column Exported.
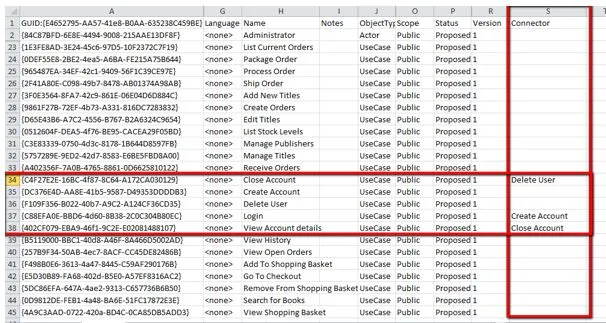
- Scenarios are exported with GUID information and parent object information under “GUID” and “ELEMENT NAME” column, respectively, which is highlighted.
- Constraints are exported with Parent object information in “ELEMENT NAME” column, which is highlighted.
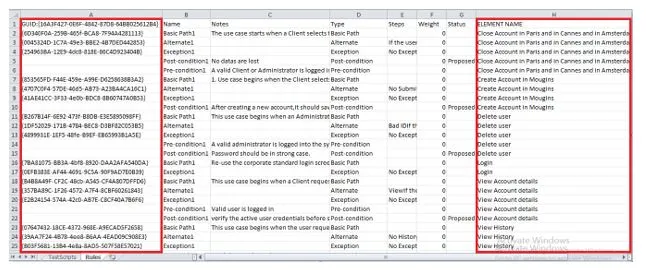
- Export profile has
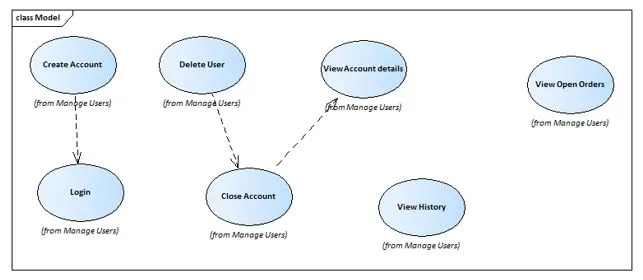
Description: Want to export Connector Other end Name. It has to filter out the connector ends while exporting,- Source and Destination are Usecase type.
- Connector Type should be “Dependency”.
- Connector Direction should be “Incoming”.
Comparing results,
- “Login” has Incoming Connector from “Create Account” of “Dependency” Type.
- “View Account Details” has Incoming Connector from “Close Account” of “Dependency” Type.
- “Close Account” has Incoming Connector from “Delete User” of “Dependency” Type.
Connector Other End names are exported successfully!
Above, section Examine Overall Export Process.


