


Add-insSparx Systems Enterprise Architect
The Excel importer in MDG Integration for Microsoft Office is a powerful tool for quickly importing and managing large amounts of data into models. It helps you to save time and reduce errors by automating the process of importing data from an Excel worksheet into Sparx Enterprise Architect.
Key features in MDG Integration for Microsoft Office – Excel Importer
- Excel importer is a powerful and flexible tool for importing data from Excel worksheets into Enterprise Architect model elements more efficiently and accurately.
- It Includes importing worksheet information as UML Elements, Connectors, Attributes, TestScript, Usecase, Glossary, and tagged values to Enterprise Architect.
- It is also possible to import hierarchical data from Microsoft Excel into Enterprise Architect.
Introducing the Interface
- Select the Excel document that contains the information to be imported.
- Choose the profile that has been defined for the particular document.
- Optionally set hierarchical composition.
- Preview the ‘About to be imported’ model content.
- Import the document to create model elements in Enterprise Architect.
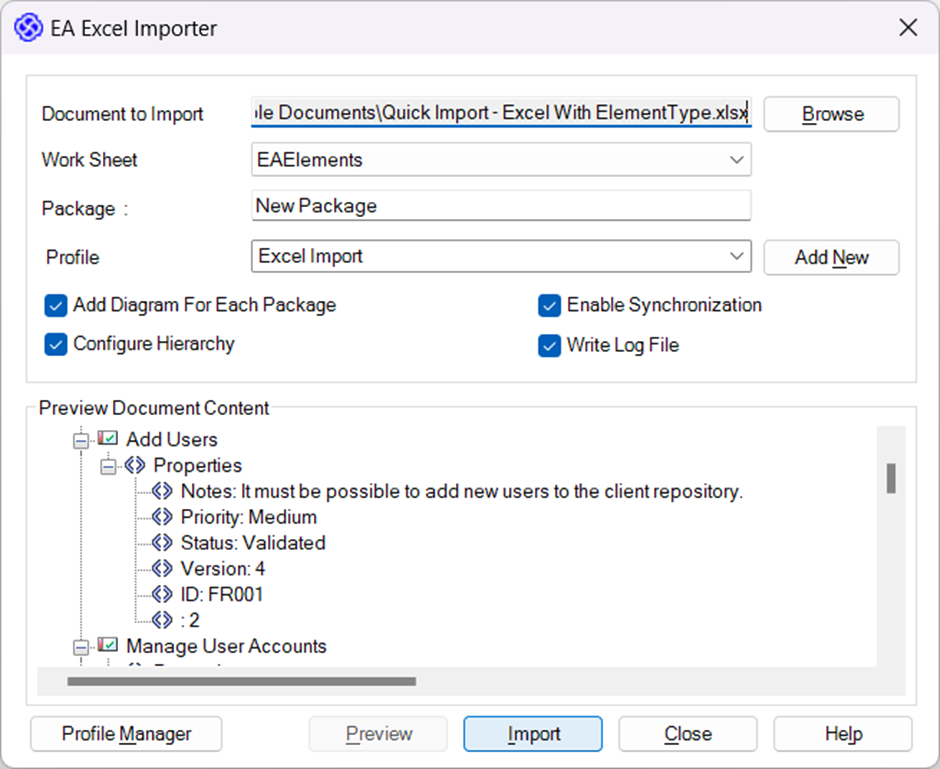
Figure 1. Excel Importer Interface
Profile Mapping
Profiles in MDG Integration for Office give users flexible and simple ways to map the EA models with an Excel worksheet by providing a step-by-step approach. This results in more efficiency and effectiveness.
Two types of profiles are supported by the Excel Importer
- Object profile – Allows the user to import the Object and its properties into Enterprise Architect Model.
- Connector profile – Allows the user to import the Connector and its properties to the existing objects in the Enterprise Architect Model.
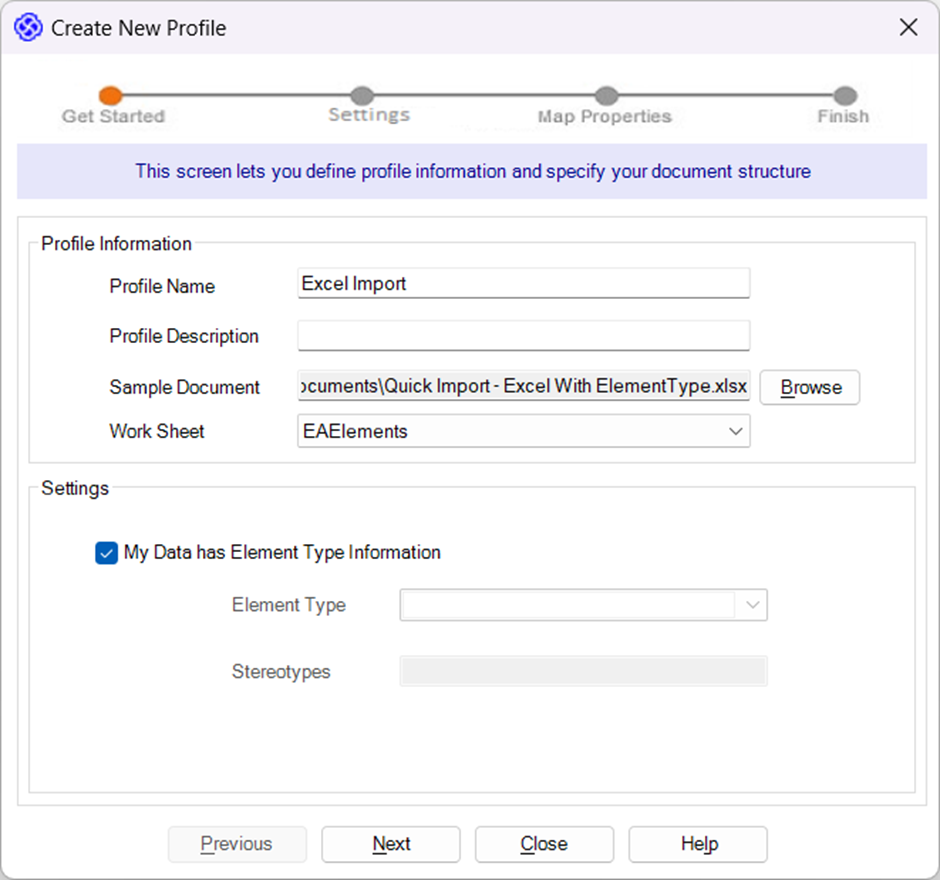
Figure 2. Excel Profile Mapping
Step 1. Get Started
Get started wizard is categorized into two sections:
- Profile Information
- Settings
Profile Information
Basic information about the profile – Profile Name, Description, and Excel document path.
Settings
If the Element Type Information (Eg: Class, Requirement, etc), is missing from the Excel worksheet then uncheck the ‘My Data has Element Type Information’ checkbox. This will enable the Element Type combo box and stereotype text fields.
- Element Type – The Enterprise Architect element types are listed here. Select a single Element type from the Excel worksheet to import the whole sheet.
- Stereotype – It allows the user to manually enter the stereotype for the object import.
Step 2. Map Element Type
It allows users to choose a column name that specifies the element type to be created in Enterprise Architect
Note: Map Element Type wizard is displayed only if the ‘My Data has Element Type’ Information is checked in the previous (Get started) screen.
Step 3. Map Element Properties
The Element Information in the Excel is to be mapped to the appropriate EA Element Property by using a drop-down list
Note: Configure Connectors – This button should be enabled only when a user mapped any of the columns as a “connector” in the EA Element Property. By default, the connector has some pre-selected values to import. We can change the selected values by clicking on the “Configure Connector” button.
More Properties – In the EA Element Property drop-down, we have an option called More Properties. Selecting ‘More Properties ‘from the drop-down, shows the below properties to map to import into EA.
- Tagged Values
- Use case
- Glossary
- Attributes
- Methods
- TestScript
Parent Package Mapping – Map the Parent information column to ‘SET_AS_PARENT _PACKAGE_1’ from the EA Element Property drop-down under ‘MULTI-LEVEL HIERARCHY’.
When ‘SET_AS_PARENT _PACKAGE_1’ is mapped, the ‘Create parent package if not exists’
The option will get enabled and checked by default. We can also change this setting if needed.
- If a parent exists in the selected sheet, it creates the object under this parent, or
- If the parent already exists under the selected package in EA, it creates the object under the parent, or
- It creates the parent as a package in Enterprise Architect and then creates the object under this parent package
Step 4. Review and create
It provides a summary of the mappings defined in the profile as well as a preview of the final model structure corresponding to the sample document.
By following the four simple steps above, we can easily create a profile. Selecting the Created Profile from the profile dropdown menu is necessary when using the EA Excel Importer. This profile allows the user to import Excel data into EA as Artifacts and connections. It will import as shown below.
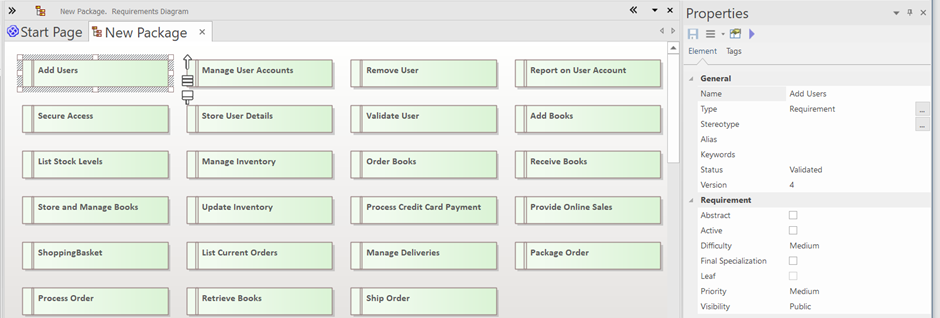
Figure 3. Import Excel Worksheet as EA Artifacts
Further Information
Please contact us or write an email to info@sparxsystems.in to have a live demo about the new EA 16 features and capabilities.